Photography tips to share

I decided to write newsletters for a while. I’ve been collecting and organizing ideas. Unfortunately, nothing was ‘finalized’ so far; it is time to take the first step and not worrying what the coming topics will be. My goal is to share some of my photography experience. By keeping topics short and sweet, I hope you like and keep reading…. perhaps with some feedback.

In the film era, it requires superb skills; a picture with correct exposure did not come easy. Digital technologies give everyone chance to create technical flawless pictures. However, they can be boring. Award winning photos could have many technical flaws, but everyone applauded. There are elements (technical or artistic) that make great pictures. Technical skills can be learnt and mastered easily. People skills take time to develop. As photography is a form of art, artistry is the most important and difficult to acquire.

Many years ago, I visited a photography exhibition. One of keynote speaker asked a question about the difference between photography and painting. He said painting is to ‘add‘ subjects you ‘like‘ on a frame; photography is to ‘eliminate‘ objects you ‘do not like‘ from a frame. Think about it when you pick up your camera next time. I am sure you will appreciate his comment.

Great pictures do not start with pressing the shutter button. It starts much earlier and much more behind it.

What makes a picture interesting ?


There are many many ways to make a picture look interesting and artistic, One factor is ‘composition’.

It takes a bit longer to write. It is difficult to write as it gets into artistic and creative side. There is no right or wrong. However, there are some basic rules ‘just’ to start with.

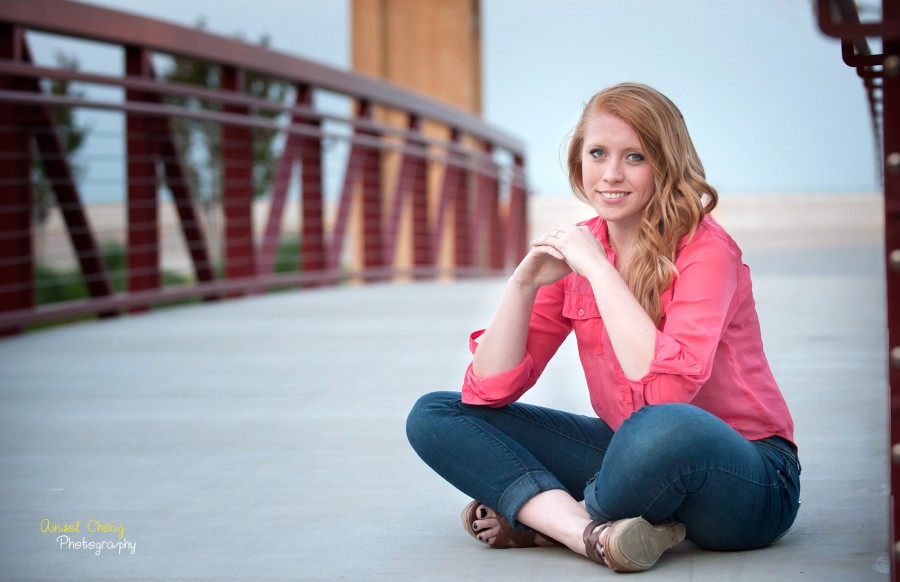
1. Rule of third – Imagine a tic-tac-toe grid on your camera viewfinder. Place the point of interests (like your subject) to four intersection of the grid. When your subject is placed at the center, audiences tend to stay onto it. However, if you put it slightly on one side, people tend to look around the picture. Also, it allows you put more objects that make your subject more interesting. (see picture with bridge on the left)

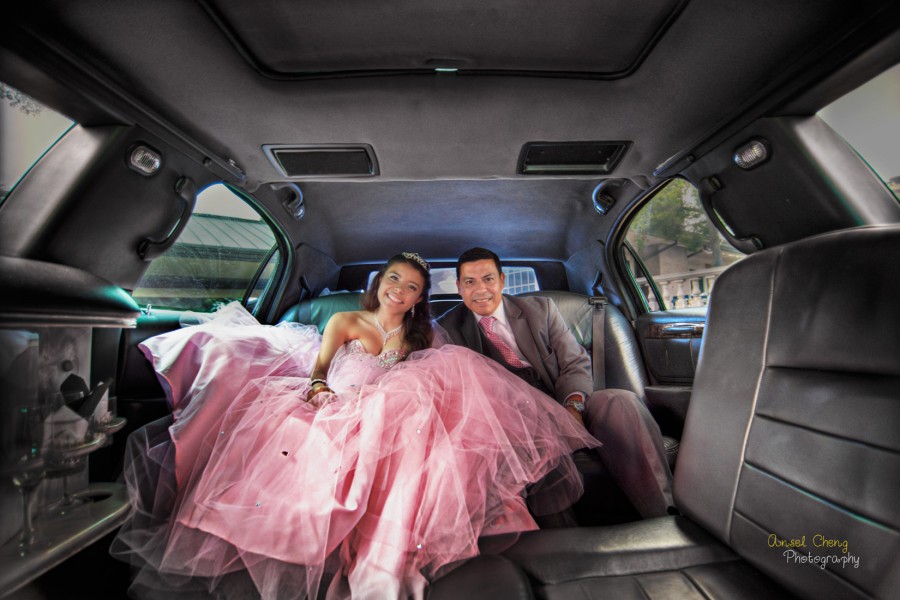
2. Leading lines – find some lines from the background that lead to the subject (picture in the limo and picture with the bridge)

3. Pattern – find repeating point of interest (picture with red poles)

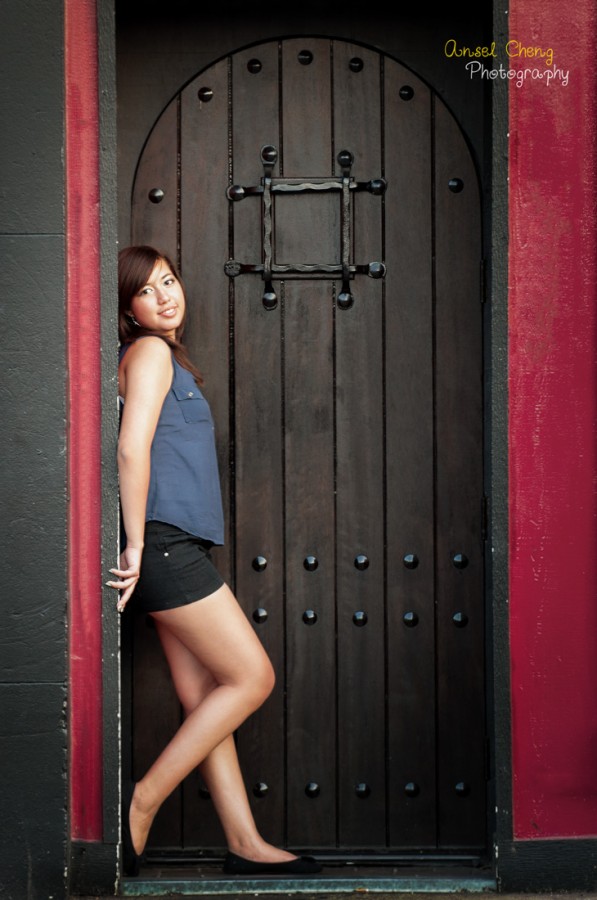
4. Frame – put your subject in a boundary or a frame (picture with the black door)

In fact, there are no ‘magic’ rules. It is all about artistry. The best advice is to learn from influential master pieces, such as pictures from Henri Cartier-Bresson and Robert Capa (photojournalism), Elliott Erwitt (documentary), and Richard Avedon (fashion). Their styles have significant impact on contemporary photography. I follow a few commercial photographers, such as Joe McNally for story telling and Jean Noir for style.

Your picture is to show the world through your eyes. So “Make” a picture rather than “Take” a picture. That means observe your subject and background carefully, find the story of your subject, magnify the beauty with lights, and visualize the final image.

I conclude this topic with a quote from Robert Capa. “If your pictures are not good enough, you’re not close enough”.

Mar 23, 2015

What give life to a portrait?


Before moving on to next topic – “composition”, I want to add a couple more points about lighting. In the previous blog, I mentioned creating depth on the face by placing light source at an angle to the subject. Another way to emphasis face contour. You can place the light source one to two feet above subject’s head while putting a reflector below to reduce contrast. (This is called butterfly/clam light). The shadow will be cast between the nose and upper lip. It is a great way to highlight cheekbones.

Many times you might be wondering why some portraits are better than others. Some magic just in there….. There are many reasons, such as the model, lighting, sharpness, the mood, make-up, facial expression, etc.  The one little magic is “catch-light” – highlight reflected off the eyes. Eye is the first part of face that audience look at. The catch-light give ‘life’ to the subject.

Attached studio picture used butterfly lighting. Also they have beautiful catch-lights off the eyes.

Click on the image to display in full.

Feb 6, 2015

What steals audience’s attention?


Your eye, naturally, is drawn to bright areas. In portraiture, you want your subject that you shoot to stand out and catch most attention.

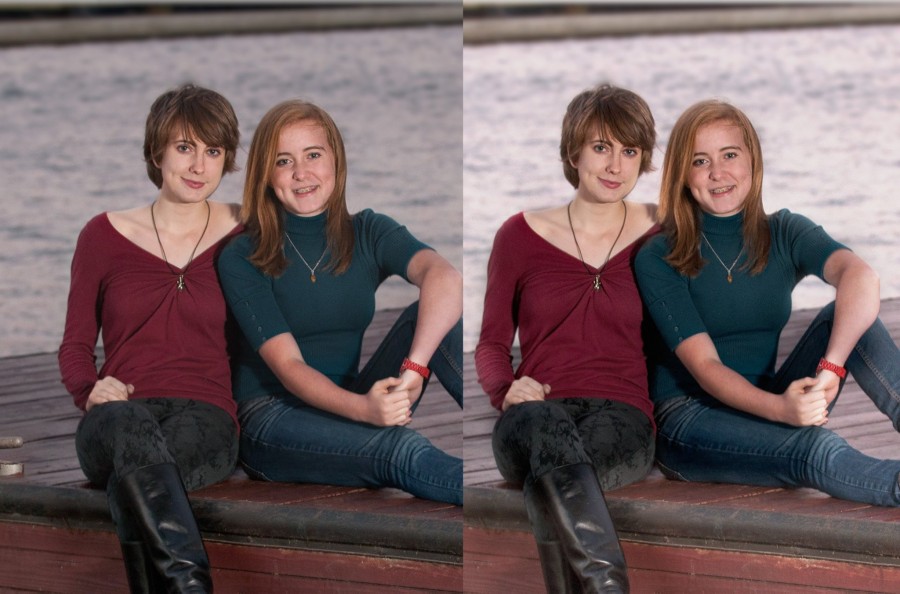
See pictures on the left. Pictures on top has bright background; it is distracting and steals attention. On the bottom picture, it is equally distracting when bright spots (not interesting and unintended) pop up in the background.

To illustrate more examples, please look at the paintings from the Renaissance https://www.google.com/…  Do you spot some commonality? 

So, pay attention to the background; frame the subject to avoid bright spots at the back. Note that these are ‘general’ rules. I will talk about exceptions from “composition” perspective in coming weeks.

Thanks you for reading.

Jan 25, 2015

No light. No like.


The word photography (in greek root) means “drawing with light”. That is why ‘light’ is vital. Like painting, artists express a three dimensional objects on a two dimensional plane. If the light source is coming from the front (like using on-camera flash), the subject will look flat and ,of course, not flattering. Proper lighting creates ‘texture’, ‘depth’, and ‘dimension’.

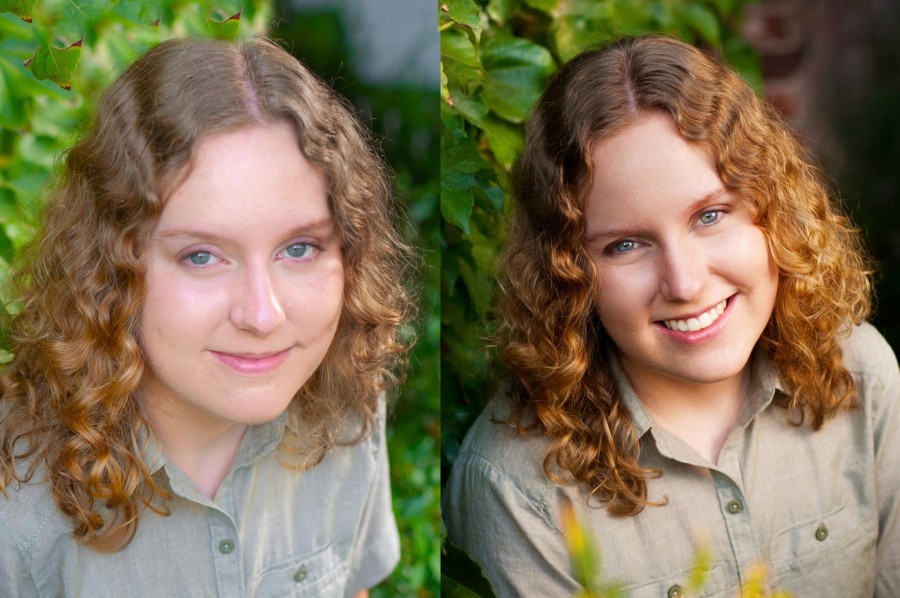
I am going to illustrate with two pictures I took last year. On the first picture, the left side of top picture was taken with on-camera flash; The flash was position right in front of the subject. It looks very ‘Flat’. The pic on right side was illuminated by a light on the side. The shadows on her eyes, nose, lip, face, and jaw created beautiful shape, depth, and dimension.

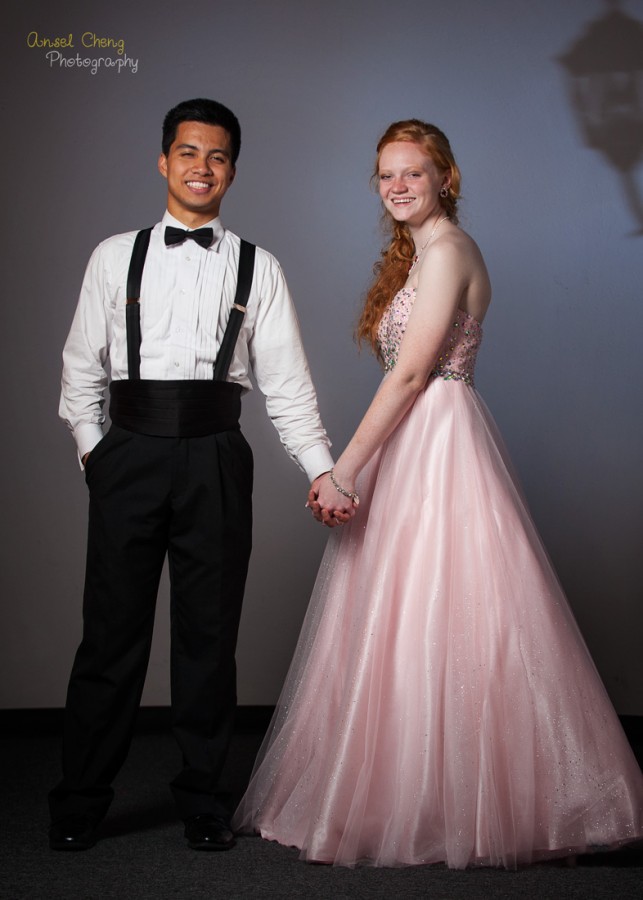
The prom picture (bottom one) best illustrates ‘texture’; the contrast shows the volume and texture of the pink dress. It looks vivid and lively.

Next time when you take pictures, observe where the light is; move your subject so that he/she and the light are in an angle; to create soft shadows, move the subject to a shady area or shoot in late afternoon; pose the subject so that the light source is at an angle (say 45 degree) with it. You will be amazed about the results.

I will discuss in depth about property of light or use of light modifiers in the future.

Jan 10, 2015